Showing posts with label Japanese Cooking. Show all posts

Wednesday, May 4, 2011

Goma Miso Chicken

It seems like it has been a while since I posted my last recipe, so today I'm posting two. Things have been a bit crazy around here the past couple of weeks. It hasn't helped that the computer has been acting up, causing the drive that holds all my recipes to be unavailable. Plus, I've been fighting morning sickness, which doesn't help my blogging about food when food just doesn't sound good at all right now. Let's just say my plans to run the Boulder Bolder are on hold for at least another year. OK, more on that life change later.

Now, back to the Japanese home cooking.


One of my favorite flavors in Japanese cooking is the combination of miso and toasted sesame seeds. You can put it on anything from vegetables to fish to chicken. I've been playing around with this sauce lately since I've had a craving for miso. As I mentioned in my last post, my family loves miso and toasted sesame seed sauce on their green beans and we eat that variation at least once a week. I had not seen anyone in the family use it on chicken yet, possibly because my father-in-law doesn't even like chicken. Anyway, I decided to play around and this is what I came up with.

Goma Miso Chicken

2 chicken thighs, cut up in bite sized pieces

2 tblsp/30ml sesame oil

½ cup/120ml of water

2 tblsp/30ml aka miso (any miso will work, red is preferred in our family)

2 tblsp/30ml toasted white sesame seeds - milled


In a skillet or heavy saute pan, add in the oil and heat it until it is smoking hot. Take the cut up chicken pieces and saute them until cooked through.

Add the water and get all the pan juices up from the bottom of the pan before adding the miso.

Turn down the heat to medium low so as not to overcook the miso. (Miso contains probiotics and cooking it at a high heat will distroy those good bugs.) Stir until the miso is disolved.

Add in the milled sesame seeds and continue to stir until the sauce thickens. It is now ready to serve.

Serve on bed of quinoa (rice or GF pasta would work too). One variation of this dish that can make this a one dish meal is to add some frozen vegetables at the same time you add the water to the chicken. Enjoy.

Green Beans in a Tofu and Miso Sauce


This dish is based on a recipe for shiraae sauce. Our family loves to have green beans with goma miso sauce (pictured below) which is just miso and toasted and milled sesame seeds, so I thought I'd mix in tofu with the miso and sesame seeds as they do for shiraae sauce. Shiraae is typacally sweeter and is often flavored with umeboshi (salted plums) but this version is a quick and easy version using ingredients that can be found at your local grocery story or health food store.

Shiraae - Vegetables in tofu flavored with miso

1 block firm or extra firm tofu

3 tablespoons/45ml toasted white sesame seeds, milled in a coffee grinder

1 tablespoon/15ml aka or shiro miso (any miso will do)

1 tsp/5ml mirin

1 tsp/5ml wheat free tamari

3 cups frozen single or mixed vegetable (green beans are pictured above)


If you are unable to find toasted sesame seeds (usually in the Asian isle) place sesame seeds in a dry saute pan and toast over very low heat until toasted. Be careful, they will jump out of the pan if it is too hot.

Boil the vegetables in salted water according to package directions (ex. 5-7 minutes for beans). When the vegetables are tender, drain and rinse in cold water or place in an ice bath to stop the cooking process. Set aside.

Blend together the remaining ingredients in a blender or food processor until smooth. Add water if it is too thick and adjust miso amount if needed, but it will be a little on the salty side at this point.

Mix in vegetables, refrigerating any leftover tofu mixture. Makes 4 side dish servings.

Wednesday, April 6, 2011

Onigiri aka The Rice Ball

Makiko Itoh wrote an article for The Japan Times (link is in English) about this humble rice ball’s importance to the victims of the recent earthquake and tsunami. As she does a wonderful job in telling the tale of onigiri, I will not go into it here. Suffice it to say that these are easy to make, once you get the hang of pressing the rice into shape.

Read Makiko's entire article as she also give you a detailed how-to on making umeboshi onigiri. The pictures below are of our family favorite, bonito filled onigiri, but you can fill these with just about anything from last nights leftover fish, marinated mushrooms, or pickles. As long as the filling is on the salty side, most anything can be used. These are not dipped in soy sauce, so the only salt is in the center or on the outside of the rice. Have fun experimenting until you find the filling that you like.


When we went to Japan last April, I had the opportunity to hone my technique with my mother-in-law when we made onigiri for our day trip to Kamakura (pictured above) as well as to and from the airport. She is an expert at it and had three made by the time I had finished one. I think my youngest has been missing her onigiri, as he has been asking for it a lot lately. Either that or he has been seeing them on the news footage lately which has sparked his craving.

Bonito Filling for Onigiri:

1 cup (large handful) of bonito shavings
1/2 tsp/5ml wheat free tamari
1/2 tsp/5ml mirin

Mix ingredients in a bowl, using half for each rice ball.

Bonito after tamari and mirin were added. It really shrinks down.

I got this tip from Makiko too: place plastick wrap in the bowl first. You can use it to help shape the ball in a later step.

Cover the filling with more rice.The finished product. Sprinkle with a little sea salt before placing them in a lunch box or before eating. Enjoy.


Monday, March 21, 2011

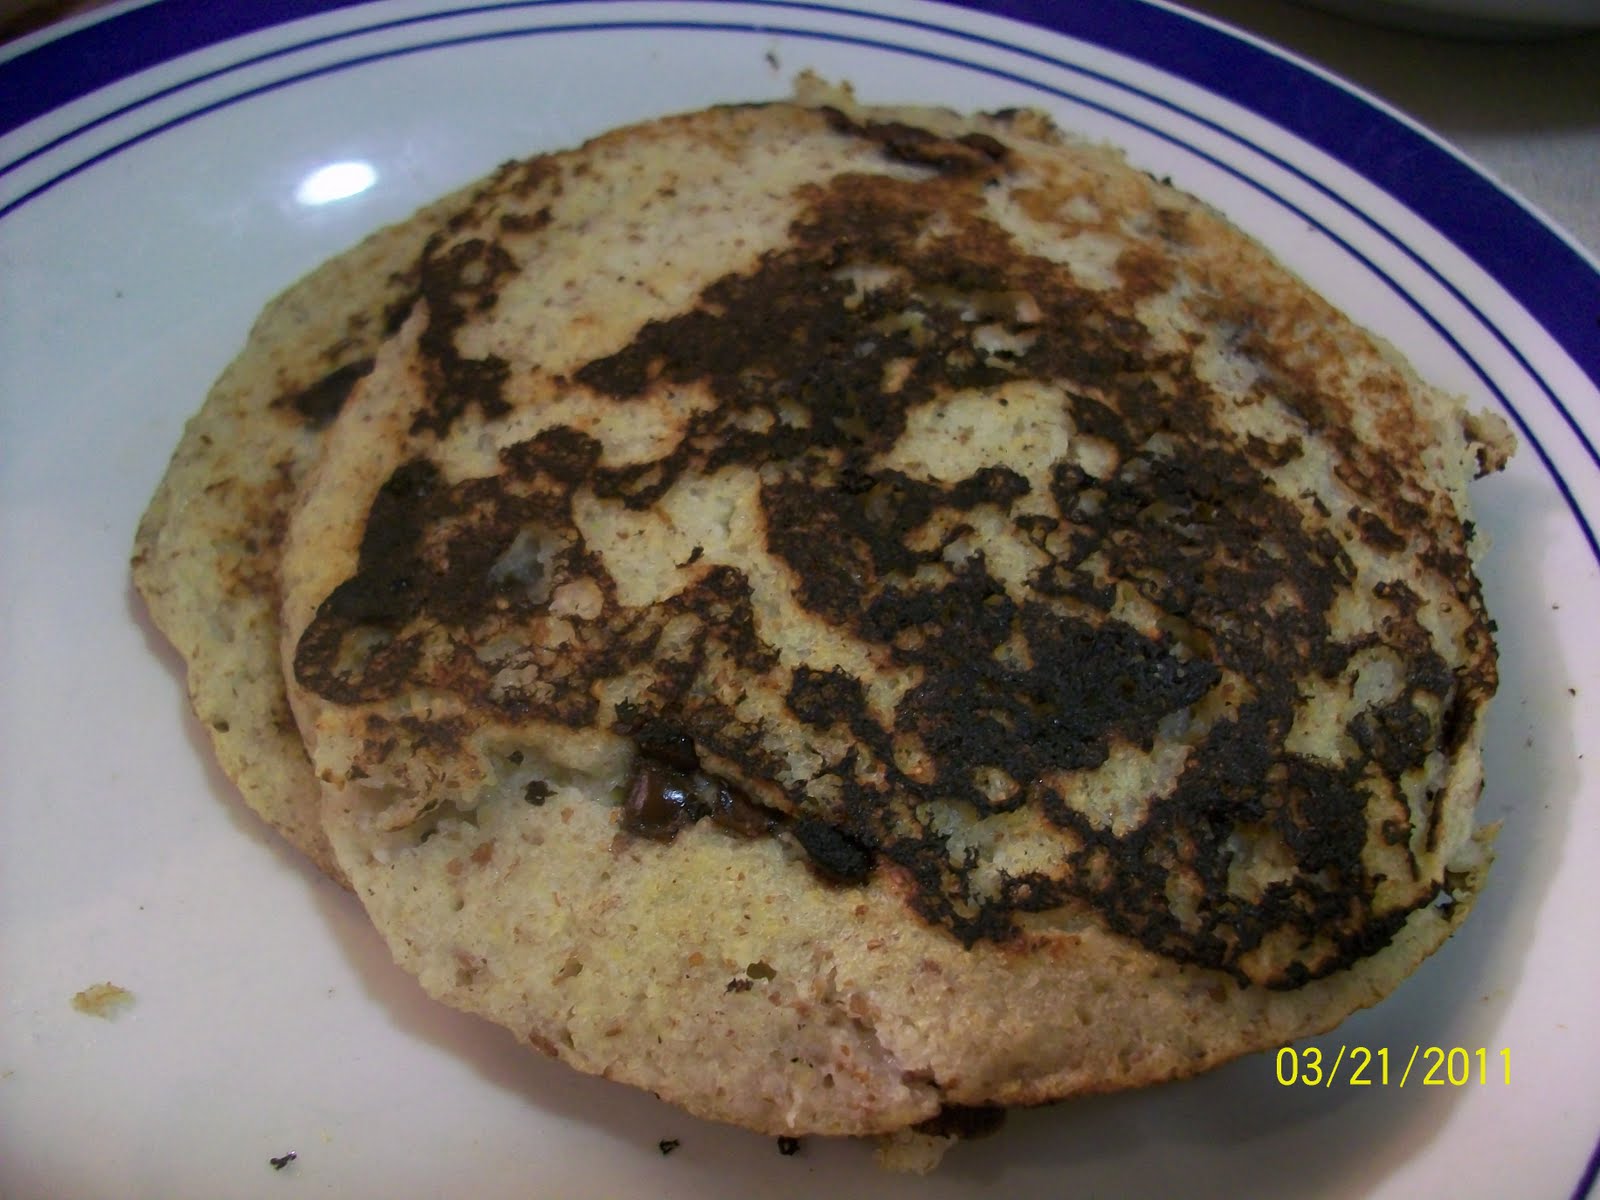
Inspired Okara Pancakes (Hotcakes)

Hot off the pan.

This recipe came by way of some inspiration from fellow blogger, Hiroyuki of Japan. He's been playing with some different ways to use okara (the leftover bean mash from tofu making) so I played with the pancake recipe he had recently posted for Okara Pancakes.

He used a pancake mix, but I just took my pancake recipe and played with the amounts a little bit. They turned out good, as I had sweetened them up for the kids. However, I think they would be really good without the added sugar and and topped with adzuki bean paste instead of my usual brown rice syrup.


Filled with chocolate chips for one boy.


Inspired Okara Pancakes (Hotcakes)
(all amounts are by volume)

1 cup/235ml fresh made okara
1 cup/235ml brown rice flour
1/2 cup/120ml applesauce
1 tbsp/15ml brown sugar
1/2 tsp/2.5ml salt
1 tsp/5ml cream of tartar
1/2 tsp/2.5ml baking soda
1 tsp/5ml guar gum
2 tbsp/30ml flax seed-milled in coffee grinder
6 tbsp/90ml hot water
2 cups/470ml plain hemp milk or milk of choice


Combine flax seed and hot water in a small bowl and set aside (or use 2 large eggs if you prefer).

Combine all dry ingredients and blend well, making sure to break up any lumps in the brown sugar. Add in the okara, flax seed mixture, applesauce, and the hemp milk. Blend well for 1-2 minutes.

Pour out on a hot and oiled pan or griddle (I use cast iron). This is a good place to add in chocolate chips or blueberries. Prepare as you would any other pancake and enjoy.

I'll let you know if I do make the adzuki bean version.

Kelly

Thursday, March 17, 2011

Miso Mashed Potatoes


Miso Mashed Potatoes along with Ginger and Tamari Whitefish, Cremini Mushrooms in Dengaku Style Marinade, and edamame with a splash of GF Tamari.


Mashed potatoes are naturally gluten free, but when you are also dairy free it makes for an interesting challenge. Miso soup and potatoes go hand in hand in many traditional Japanese recipes so it wasn't that much of a leap to put a little miso in my mashed potatoes in place of butter and milk. This is a super simple side dish. It is also my oldest son's favorite way to eat potatoes (other than homemade fries). Enjoy.

Miso Mashed Potatoes

4 medium potatoes

2 tsp/10ml Japanese aka style miso (I use Cold Mountain Miso)

½ to 1 cup/100-200ml reserved cooking water

Boil the potatoes in enough water to cover until they are tender, about 10-15 minutes. Remove the potatoes, reserving the liquid, and place them in a serving dish. Mash them by hand with a potato masher or with a electric beater. Add in the reserved cooking water and the miso. Blend well, add more water if the potatoes are too dry. Serve warm.

Wednesday, March 9, 2011

Deep Fried Tofu in GF Tamari Soup

So as I sit here reflecting on the night's meal, I am thankful for kid friendly tofu recipes. I've mentioned before that I have a picky eater due to texture issues, but kids are still kids and if you deep fry it, "they will come".

One of the biggest challenges when being both gluten and corn intolerant is finding a decent breading. Thankfully the Japanese are one step ahead of me on this and what isn't dusted with panko, is dusted with potato starch. I will elaborate more on this when I post my chicken fingers recipe, but for now let me say that potato starch becomes light and crispy when fried. It also sticks to most everything, as all starches tend to do, making it a snap when dusting freshly made tofu.

Now the soup is not much different than soy based ramen soup. I wouldn't suggest drinking it as it has a high sodium content, but the tofu and potato starch combo take in just enough that this is one dish that will be hard for you to watch your portion control. Due to the nature of the dish, I try not to make it more than once a month as deep frying is not the best thing for one's health. But, if you let the tofu drain properly after frying, it will not be greasy and any excess grease is left floating in the soup stock after the meal. However, when looking for an easy, kid friendly dish, I suggest giving this one a try. Not to mention, this is one way to get your kids to eat tofu and not wrinkle their noses at it. Enjoy.


Deep Fried Tofu:

1 block of Homemade Tofu (I recommend Denver Tofu if you don't make your own)
1/4 cup potato starch

Take the tofu out of the water (or drain it off if using commercial tofu) and wrap it in either 2-3 paper towels or a clean kitchen towel. Place a weight on top, such as a plate, and leave it to release any excess liquid for at least 30 minutes. You want almost dry tofu for this as any liquid in the tofu will cause the grease to splatter and spit.

Heat a large skillet or dutch oven up with enough oil for frying and place it on medium to medium high heat (about 375 degrees or hot enough that the tofu floats easily to the top while frying).

Cut the tofu into bite sized pieces. Place the potato starch into a small bowl and dredge the tofu through the potato starch, making sure to cover all surfaces. Deep fry until lightly golden brown, but not too dark as it will continue frying once it is removed from the oil. Drain on a paper towel or rack.

GF Tamari Soup:

2 cups of hot dashi stock or hot water
2 tablespoons/30ml wheat free tamari
2 tablespoons/30ml mirin*

Combine all ingredients and mix well. Pour into serving bowls. This makes two adult servings. You can also use it as a dipping sauce if you prefer.

Add the tofu and serve hot.

*This is one recipe where mirin is a must, as the alcohol of sake (if used as a substitution along with sugar) would remain.

Sunday, March 6, 2011

Cremini Mushrooms in a Dengaku Style Marinade

Tofu no dengaku is a common dish in Japan where tofu is grilled on skewers and topped with various miso based sauces. While I was playing with some homemade tofu and the various miso sauce versions one night, I was thinking that grilled Portobello mushrooms would go really well with this sauce. At that point, I had yet to try grilling my own Portobello mushrooms and it had been a few years since I’ve had a grilled Portobello. I usually add mushrooms to my stir-fry or nabemono dishes or sautéed mushroom to use in a pasta dish, but I had yet to get the kids to try the larger mushrooms as the ‘meat’ of the meal.

My first attempt went well, however I didn’t get the marinade quite right and ended up burning the mushroom caps a little because of the higher sugar content of the sauce. For my second attempt, I used cremini mushrooms, which are just small Portobello mushrooms. It turned out much better and I got rave reviews from my husband who is the true test of a good Japanese meal (for which my mother-in-law’s wonderful cooking is to blame). He’s biased, but he also knows that if I ask, “how was it,” that I’m fishing for the truth as to whether I need to adjust the recipe a certain way or not.

One of the things about this recipe is it calls for umeboshi. Umeboshi is made from nanko plums and they are salt cured with shiso leaves, which gives them their unusual color. I can find umeboshi at the local health food store (a little pricy, but a little goes a long way), but we are also spoiled that my mother-in-law sends homemade umeboshi every year so that my husband can have a little taste of home in his lunches. I guess it is one of the perks of being married to an only child, but it also means that I need to use these salty plums whenever I have a chance because I know she’ll be sending more next year.

So, here is the perfected version based on the plum neri miso found in Gaku Homma’s ‘Japanese Country Cooking’. This marinade can be used on either Portobello, cremini, or even the ordinary white button mushroom. Enjoy.

Cremini Mushrooms in a Dengaku Style Marinade

2 tablespoons/30 ml Cold Mountain Red Miso-Japanese Style Aka Miso or comparable red miso

1 tablespoons/15 ml golden brown sugar

1 umeboshi plum, pit removed or 1 tsp/5 ml Eden Foods Umeboshi Paste

1 tablespoon/15 ml sake

2 tablespoons/30 ml kombudashi* or water

5-6 medium to large cremini mushrooms or 3 Portobello mushroom caps with stems removed

Wipe the mushrooms clean with a damp cloth. Cut the mushrooms in half, unless using Portobello, and place in a plastic freezer bag.

Blend the marinade ingredients in a food processor until well blended. Transfer the sauce to the plastic bag. Close and mix well, making sure that all surfaces are coated. Marinade at room temperature for 2-4 hours.

Once marinated, wipe the surface of the mushrooms clean and place in a preheated and oiled sauté pan. Add mushrooms and sauté for 2 minutes before adding 1/2 cup of water then sauté for an additional 2 minutes. Turn and cook for another 3-4 minutes. Remove from heat. Add the marinade to the pan and cook down ‘til thick and bubbly. Pour over the mushrooms and serve.

*Hint: I freeze my dashi in ice cube trays. Each ice cube is about 1 tablespoon in volume and this is a great way to be able to grab just the right amount of dashi when the recipe only calls for a small amount.

Portobello mushrooms in the first version of the marinade.

Thursday, February 24, 2011

Home Made Dashijiru

Dashijiru is the base of many a Japanese dish. I am listing several varieties of dashi as a reference for those of you that wish to make authentic Japanese dishes completely from scratch. There is commercial dashi out there or you can just use water, but the addition of dashi gives you a depth of flavor much like chicken and beef stock does in American dishes.

Basic Kombudashi:


1-4" piece of dried kombu (I like Eden Organics)
4 cups/1 liter water

Soak kombu overnight in water. You can soak it for as little as an hour if you start with hot water, but the stock will not be as flavorful.

Bring water and kombu to a boil over high heat. Boil for 5-6 minutes. Turn off the heat and remove kombu*.

*This can be used thinly sliced and sauted in oil with a splash of tamari for a tasty side dish.


Katsuo-bushi Dashi:

1 cup bonito flakes by volume (these are vary fluffy-a handful will do)
4 cups of basic kombudashi

Add the bonito flakes to the kombudashi once the kombu is removed and cook it for an additional 3 minutes. Run the stock through a strainer to remove the bonito (if you have a cat or dog, this makes a great treat for them). This variation makes excellent soup stock for your udon or ramen noodles.

Shiitake Dashi:

4 dehidrated shiitake mushrooms
1 cup of boiling hot water

Place shiitake into the hot water and let it soak for up to 30 minutes. Remove the shiitake and use it in your recipes. The resulting stock can be saved for later use or used in any recipe that also calls for shiitake mushrooms such as my Sauted Chicken and Dandelion Leaves.

Simmered Sweet Potatoes Nikkorogashi Style

Nikkorogashi is a simmered Japanese dish that usually consists of taro potato (It's not really a potato, it's a distant relative of the philodendron) and onion simmered in dashi stock and soy sauce. Some variations have mirin added, but when using sweet potato I find that this recipe is sweet enough to not need the added sugar. I used white garnet yams in the photo below, but you can easily swap them out for regular sweet potatoes or even your Idaho baking potato and still get wonderful results.

There are several kinds of dashi, but the most common one now days is in the form of Dashi-no-motto. Dashi-no-motto is a powdered seasoning that can be bough in packets and added to your dishes mixed in a little water to form a broth. Though Dashi-no-motto tastes great, it is made from yeast and loaded with preservatives and msg (unless you are lucky enough to find the msg-less variety). I prefer making my Dashi from scratch and I usually make kombudashi. If you don't have the time to make kombudashi from scratch, the easiest thing to do is just use water. You won't get the depth of flavor that you would have with dashi, but between the caramelized onions and the tamari, you still will have a very tasty side dish.

It is also very important that the pan you use has a lid. The majority of simmered dishes in Japan are simmered under cover and it does affect the flavor of the dish. This belief dates back to times when the Japanese believed that if you left a dish uncovered while cooking that evil spirits would get into your food and spoil the dish. I don't believe in the evil spirits, but your liquid will evaporate before the potatoes are cooked and you'll end up with dried out and flavorless potatoes instead.

Ingredients:

1 large sweet potato or yam, diced
1 medium sized onion cut into thin slices
1 Tablespoon/15 ml sesame oil (not toasted!)
1 cup/200ml kombudashi (see link for details)
3 Tablespoons/45 ml Wheat Free Tamari

Heat up a dutch oven or large sauce pot over medium heat and add the oil. Once the oil is smoking hot, add the onions and stir, being careful not to burn them. Once the onions are translucent, add the potato and saute until coated with oil.

Add the kombudashi and tamari. Stir to mix and cover. Turn the heat down to medium low and cook for 10-15 minutes or until the potatoes are tender. Serve warm. This also makes great leftovers as it tastes even better the next day.

Thursday, February 3, 2011

Sushi 101

Now that my oldest son is in school all day, I've had to learn the art of making a lunches for him that, hopefully, doesn't come back home in his lunchbox or end up in the trashcan. The kid isn't real big on the standard American sandwich and he has never been much of a meat eater. What is a mother to do with a picky eater away from home?

Fortunately, I have a cook book that had how to make basic sushi. I first dabbled with making sushi just for fun when he was still a baby. It was more for a take along lunch to the local Cherry Blossom Festival. (Which happens in July long after the Cherry trees are done. I really have no idea why they scheduled it this way.) He loves to eat sushi for lunch which is really nothing more than nori, steamed rice, and bonito flakes, but he feels like a king when I send it with him.

Now I'm not talking about the raw fish type of sushi mind you. We live rather land locked and getting good sushi fish isn't cheap. This is really just your basic sushi roll. You can add any ingredients you like. I personally make mine with whatever I have on hand, asparagus, cucumber, carrot, bonito (cured and shaved tuna), anything really as long as you can cut it long and narrow so that it will fit inside your nori and rice roll. Now my son doesn't really like true sushi rice, but I am including the sushi rice recipe that I use when I make it for just me and my husband. All you will need is a sheet of nori (preferably toasted and labeled for sushi), steamed medium grain rice (you need it to be sticky), your filler, a very sharp knife, and some way to roll it. I use an old bamboo place mat that I picked up from either Target or Pier One. You can find sushi mats, but you could get away with just using wax paper or plastic wrap as long as you get a good and even press to your roll.


Lay your sushi mat out on a flat surface and line with either plastic wrap or wax paper. I prefer unbleached wax paper. Lay a sheet of nori on top with the rough side facing up. This sheet just happened to be half size because it was for my son's lunch. One sheet of nori will make up to 10 rolls, depending on how you cut it.

Spread out your rice onto the nori, remembering to leave a little space at the far end so that you can seal it.

Position your filler. Today's choice was bonito flakes. Don't get carried away here, as too much filler will make it hard to roll, causing the roll to fall apart when you pick it up.
Begin to roll your sushi. I use a combination of rolling the mat and pulling out the wax paper as I push forward. This takes the most practice. Believe me, it use to take me half an hour to make a sushi lunch. Now I can make it in five minutes.

This is what your mat looks like while you are rolling. Make sure to press firmly over the whole roll. It is also a good idea to let it set a minute before cutting. This allows the moisture from the rice to soften the nori which helps it to stick everything together.

The above picture is after I let it set for about a minute. I take it out of my place mat and set it on a cutting board. You need a very sharp knife for this part. The rice is very sticky and the faster you cut through it, the cleaner your edges and your knife will be.
Cut through the paper, this helps to make for a clean cut.


Unroll the sushi from your paper and serve. We like to use only wheat free tamari, but traditionally you add wasabi. Be careful when adding wasabi to your tamari as a little goes a long way. Enjoy.

Su-Meshi aka Sushi Rice
originally from 'Japanese Cooking' by Emi Kazuko

3 cups of cooked medium grain rice-I prefer Calrose
40 ml or 8 teaspoons unseasoned brown rice vinegar
20 ml or 4 teaspoons sugar (I use light brown cane-but it gives the rice color. Also, I never pack my brown sugar.)
5 ml or 1 teaspoon sea salt

  1. In a small bowl, mix the vinegar, sugar, and salt until well dissolved.
  2. Add to the rice and mix using a wet spatula. Do not smash the rice.
  3. If you have a fan, use it to cool off the rice for a glossy sheen. Otherwise, let it cool enough to work with.

Monday, January 31, 2011

Niku Jaga

Winter has finally hit were I live and as I sit here thinking about what to write, my thoughts turn toward comfort foods. At our house, one of the comfort foods happens to be Niku Jaga. Really, this is just Japanese for simmered beef and veggies. Much like beef stew here in the US, in Japan everyone makes it with a personal flair.

My favorite version is based on the recipe I got from Gaku Homma's book. This version only uses ingredients that are readily available at you local grocery store. If you want an even more authentic taste, add some yam cake noodles, shiritake, which you can find at some health-food stores packed in water in the refrigerator section, usually next to the tofu. My version doesn't have them due to a personal preference, but you don't have to change the sauce part of the recipe if you do add a package.

Another trick I learned when preparing potatoes for these simmered dishes is to soak them in cold water before adding them into the recipe. It helps to remove some of the starchiness and removes some of the aku. In Japanese, aku is something that is tied into their religious beliefs. To make a long story short, it is the name for the foam that appears during the cooking process. It is bitter and if it isn't removed it will mess with the flavor of your meal. So when removing the aku, you just skim the foam off.


Niku Jaga

1/2 lb. sliced beef in bite sized pieces or ground beef
1 onion
2-3 carrots, chopped
2-3 potatoes
1-2 cloves of garlic, minced

2-3 tablespoons sesame oil (not toasted!)
6 tablespoons Wheat Free Tamari
2 tablespoons sake
2 1/2 tablespoons light brown sugar


  1. Preheat your dutch oven or large cooking pot over medium heat and coat the bottom with oil. Add the meat and saute until it changes color.
  2. Add the onion and carrots and stir to coat them with oil and cook until the onions begin to appear translucent.
  3. Add the potatoes, also stirring them until they are coated with oil.
  4. Add 4 cups of water to the pot, enough to cover all the ingredients.
  5. Reduce the heat to medium low and cook until the aku is released (the foam I was talking about). Skim the foam off the top using a slotted spoon or fine mesh strainer.
  6. Add in garlic, tamari, sake, and sugar. Cover. Continue to cook 10-15 minutes until the potatoes are soft and the meat is cooked through. Serve with rice.